
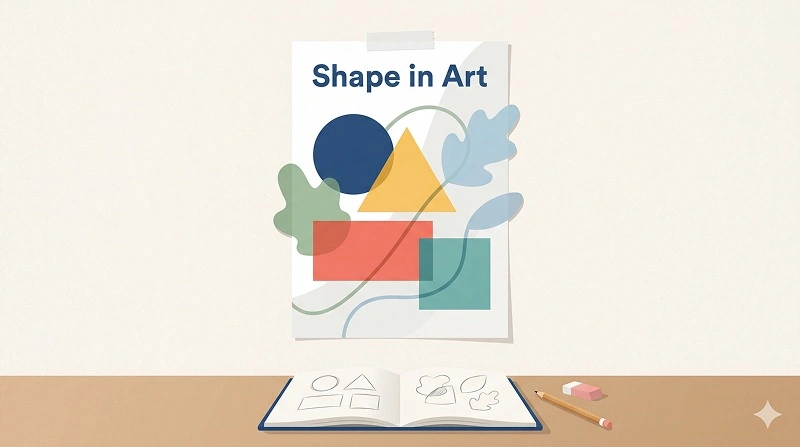
In art, shape is a flat, enclosed area created when a line closes or when a change in value, color, or texture sets one area apart from another. When people ask for a clear definition for shape in art, they are really asking how artists turn what they see into simple, flat areas that can be organized on a page or canvas.
Learn more about: What Badges in Notifications
TL;DR – Key Points
- Shape is a two-dimensional, enclosed area with only height and width.
- There are two main categories: geometric (regular, math-based) and organic (irregular, nature-like).
- Artists use shape to simplify complex subjects, build accurate drawings, and design strong compositions.
- Thinking in shapes first, then adding detail, is faster and more reliable than “drawing what you think you see.”
- Positive and negative shapes (what you draw vs. the space around it) work together to create readable images.
What Is Shape in Art, Really?
Basic definition and how it differs from form
In studio practice, the most practical definition for shape in art is: a flat area that feels “cut out” from its surroundings because its boundary is clearly defined. That boundary can come from a line, a sharp shift in value (light vs. dark), a color change, or a texture edge. Shape is always two-dimensional, so it has height and width but no real depth, even if shading suggests volume.
Form, by contrast, is shape plus depth. According to standard art theory, form is three-dimensional and can be walked around in real life or convincingly shaded in drawing. So a drawn circle is a shape, while a shaded sphere is a form. Keeping this difference clear helps you know when you’re planning flat design and when you’re building the illusion of 3D.
Two complementary ways to define shape
Based on experience teaching beginners, two complementary definitions work best:
- Contour-based definition: a shape is a closed outline, like a silhouette.
- Value/contrast-based definition: a shape is any area that reads as one “piece” because it shares a similar lightness, color, or texture.
The contour idea is easier for students who like line drawing, while the value/contrast definition is crucial for painting and realistic shading. In practice, you constantly switch between both: you notice outlines to place objects, and you notice value shapes to build light and shadow.
How shape fits among the elements of art
Shape is one of the seven classic elements of art: line, shape, form, value, color, texture, and space. Line often creates shape; value and color separate shapes; form grows out of shape when you add depth. Space (the sense of near and far) depends heavily on how you overlap and scale shapes. When you think of these elements as a team, shape becomes the organizing backbone that holds the others together.
What Are the Main Types of Shape in Art?
Geometric shapes: regular, countable, and predictable
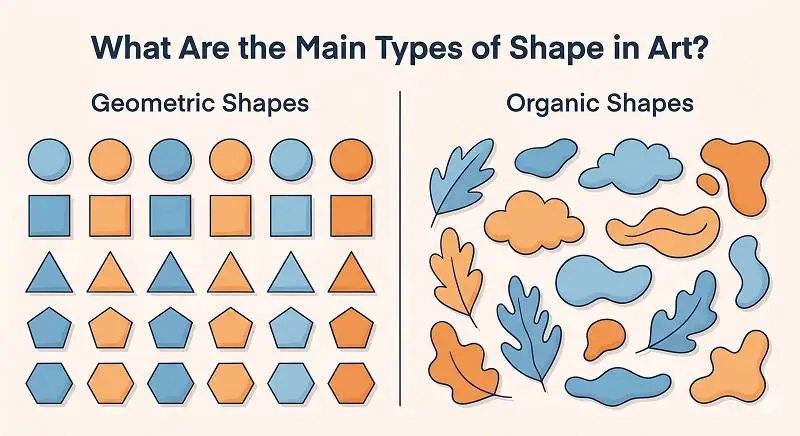
Geometric shapes are regular, often symmetrical shapes that can be measured and described with math. Common examples include circles, squares, rectangles, triangles, and hexagons. Industry standards in design education treat these as the “building blocks” for man-made objects because they are easy to repeat and scale.
In real-world drawing, phones, screens, doors, windows, and most buildings simplify into combinations of rectangles and circles. According to design research, viewers tend to read geometric shapes as stable, organized, and man-made. Below, you would typically see diagrams of common geometric shapes and how they appear in everyday objects.
Organic shapes: irregular, flowing, and natural
Organic shapes (sometimes called freeform shapes) are irregular, fluid, and usually not mathematically precise. They resemble the contours of plants, clouds, rocks, animals, and the human body. Unlike geometric shapes, they rarely have standard names beyond loose descriptions like “leaf-shaped” or “blob-like.”
In practice, any shape that feels like it could appear in nature, without a ruler or compass, falls into this category. Research in visual perception shows that people often associate organic shapes with life, movement, and emotion. Below, you would typically see silhouettes of leaves, splashes of ink, and animal outlines as examples of organic shapes.
Why this two-part classification matters
Dividing shapes into geometric and organic is not just academic; it speeds up both observation and construction. When I sketch a city scene, I consciously tag buildings and cars as mostly geometric and trees and people as mostly organic. This mental sorting tells me which drawing tools to emphasize: straight edges and clear angles for the first group, flowing curves and varied contours for the second.
How Do Artists Actually Draw Using Shapes?
Why thinking in shapes beats “drawing the thing”
When beginners try to draw a chair, they often start with “a leg,” then “another leg,” and quickly get lost. According to drawing pedagogy, a more reliable method is to ignore the object’s name and see it as a group of large shapes. So instead of “chair,” you see a tall rectangle (back), a wide, shallow rectangle (seat), and a few narrow rectangles (legs).
This shift from “thing” to “shape” is powerful because your brain is less likely to distort what it sees. In practice, artists who think in shapes first get better proportions and perspective, even with limited experience. Only after the big shapes are correct do they add details like slats, cushions, or decoration.
Step-by-step: building a drawing from shapes
A simple, repeatable process looks like this:
- Squint at the subject to blur details and see only big light and dark masses.
- Block in large shapes (usually 3–7) that capture the overall silhouette and main value areas.
- Check proportions by comparing widths and heights of these shapes against each other.
- Refine into smaller shapes, like the shape of a window inside the shape of a building.
- Add contour details and texture on top of this solid structure.
Based on experience, students who follow this workflow improve accuracy faster than those who focus on outlines alone. The shape-first approach gives you a “safety net” so details have a correct structure to sit on.
Three everyday examples that make the concept click
Here are three concrete examples you can imagine (or see in a typical classroom handout):
- Example 1: A bottle – Start with a tall rectangle for the body, a smaller rectangle for the neck, and a tiny oval for the opening. Then soften and adjust to match the actual curves.
- Example 2: A house – Begin with a large rectangle for the walls and a triangle on top for the roof. Add smaller rectangles for doors and windows inside those bigger shapes.
- Example 3: A tree – Block a long, narrow rectangle for the trunk and a large, uneven organic shape for the foliage mass. Later, you carve in smaller organic shapes to suggest clusters of leaves.
How Do Shapes Help With People, Animals, and Complex Subjects?
Simplifying organic subjects into clear, draw-able parts
Complex organic subjects—hands, faces, animals—seem intimidating until you break them into simple shapes. For a head, many instructors start with an oval or egg-shaped form; for a hand, a rough pentagon for the palm plus small rectangles or tapered shapes for fingers. According to figure drawing best practices, this shape simplification is the first step before any anatomy detail.
In practice, I often ask students to “flatten” what they see: imagine the shadow of the subject cast on a wall. That shadow is a shape. By tracing or drawing that silhouette, you bypass the mental noise of “this is hard” and simply copy the flat outline and large value shapes.
Using overlapping shapes to suggest depth and space
Although shape itself is flat, overlapping shapes are one of the strongest tools for creating depth. When one shape overlaps another, our brains automatically read it as “in front.” Designers and illustrators use this constantly: a character overlapping a background shape instantly pops forward.
You can practice this with a simple still life: place a mug in front of a book in front of a wall. On your page, you draw three shapes, but you let the mug’s shape cut into the book’s shape, and the book’s shape cut into the wall’s shape. Without any fancy perspective, this simple stacking of shapes already suggests space.
Seven quick shape-based examples across subjects
Here are seven simple “shape-in-art” examples you can imagine as black silhouettes:
- Apple – A squashed circle with a small triangle cut out for the stem notch.
- Cat – A rounded organic body shape plus a smaller circle/oval for the head and a tapering tail shape.
- Car – A long rectangle for the body, two circles for wheels, and a smaller rectangle/triangle combo for the cabin.
- Leaf – A long, pointed organic shape, like an eye shape with one end sharper.
- Lamp – A cone or trapezoid for the shade, a thin rectangle for the stem, and a circle or oval for the base.
- Bird – A teardrop-like shape for the body, a small circle for the head, and a triangle for the beak.
- Shoe – A long, irregular organic shape that widens at the ball of the foot and narrows at the heel.
Each of these can start as a single, flat silhouette before you ever think about volume or detail.
What Are Positive and Negative Shapes, and Why Do They Matter?
Defining positive and negative shape/space
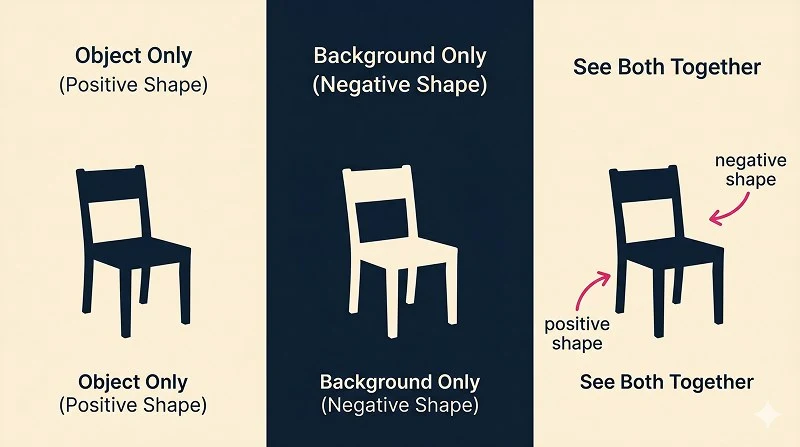
Positive shapes are the shapes of the “things” you are drawing—the subject itself. Negative shapes are the shapes of the empty space around, between, and inside those things. According to perceptual drawing research, the brain reads both at the same time, even when you consciously focus only on the object.
For example, if you draw a chair, the positive shapes are the seat, back, and legs. The negative shapes are the gaps between the legs and the space between the back slats. Those gaps have very specific, repeatable shapes that you can observe and copy.
How negative shapes improve accuracy
One of the most effective accuracy tricks, especially in life drawing, is to “draw the holes.” Instead of chasing the outline of a complicated object, you focus on the shapes of the spaces around it. These negative shapes are often easier to see as abstract, which means your brain is less likely to distort them based on what it “knows” the object should look like.
In practice, if a student’s drawing of a chair looks off, I have them ignore the chair and draw only the spaces between the legs and under the seat. Once those negative shapes match the reference, the positive shapes usually fall into place automatically. This method is widely recommended in foundational drawing courses because it reliably improves proportion and spacing.
Using positive and negative shapes in design and composition
Designers also use the relationship between positive and negative shapes to create strong compositions and logos. A classic example is the arrow hidden in the negative space of the FedEx logo. By carefully shaping the “empty” areas, designers can hide symbols, balance weight, and guide the viewer’s eye.
When planning a painting or poster, you can squint at your thumbnail sketch and check whether the pattern of light and dark shapes (both subject and background) feels clear and balanced. If the negative shapes are confusing or chaotic, the final image will likely feel cluttered, no matter how well you render the details.
How Can You Practice Shape to Improve Fast? (Conclusion and Terms)
Putting it all together: why shape is a foundational skill
When you organize what you see into simple geometric and organic shapes, you can draw almost anything. Complex objects stop feeling overwhelming because you treat them as combinations of manageable parts. This is why, when people search for a definition for shape in art, the most useful answer is not just a sentence but a process: see flat areas, simplify them, and build from big to small.
According to experts in art education, this shape-based construction is a foundational principle that underlies figure drawing, landscape painting, character design, and product sketching. Worth noting, though, is that it takes repetition; you will improve by practicing on many different subjects. The more you train your eye to see shapes instead of “things,” the more accurate, faster, and more confident your drawing will become.
Simple exercises you can start today
You can apply all of this immediately with a few short daily exercises:
- Silhouette studies – Trace or copy only the outer shape of objects from photos, ignoring all internal detail.
- Value shape blocking – In a photo, reduce everything to 3–4 big value shapes (dark, mid, light, highlight) and paint or shade only those.
- Negative shape drawing – Arrange a few objects and draw just the spaces between and around them.
- Shape classification – Look around your room and quickly label items as mainly geometric or mainly organic.
Each of these drills reinforces your understanding of shape more effectively than memorizing any single textbook definition for shape in art. Over time, you will naturally think in shapes first, which is exactly how experienced artists see.
Terms
- Shape – A flat, enclosed area with height and width only, defined by a boundary such as a line, value change, or color shift.
- Geometric shape – A regular, often symmetrical shape describable by math, like a circle, square, rectangle, or triangle; common in man-made objects.
- Organic shape – An irregular, flowing shape that resembles forms in nature, like leaves, clouds, or animal silhouettes.
- Form – A three-dimensional version of shape with height, width, and depth; a sphere is the form of a circle, a cube is the form of a square.
- Contour – The outline or edge of a shape or form, often used to define the boundary of a shape in drawing.
- Positive shape – The shape of the actual subject or object you are drawing (the “figure”).
- **Negative shape
Learn more about: Cmyk Cyan Magenta